In a significant step forward for cloud data protection, Wasabi Hot Cloud Storage has officially been validated for use with Commvault, the leading enterprise-grade data management platform.
This integration empowers organisations to leverage Wasabi’s affordable, high-performance cloud storage as a trusted backup target within Commvault’s robust ecosystem. The contents of this blog will introduce you to the benefits of this partnership and how to configure Wasabi with Commvault.
Seamless Integration
Commvault users can now configure Wasabi as a cloud storage target using multiple interfaces, including:
-
Commvault Cloud: Easily add Wasabi as a primary or secondary backup destination via the intuitive cloud console.
-
Commcell Console: Set up Wasabi storage libraries and policies for granular control over backup and recovery workflows.
-
Command Center Web Console: Ideal for current Commvault versions, this interface simplifies the process of connecting Wasabi buckets and credentials.
Benefits Delivered
-
Cost Efficiency: Wasabi offers predictable pricing with no egress or API request fees.
-
Performance: Designed for high-speed access and rapid data retrieval.
-
Security & Compliance: Meets stringent data protection standards, making it ideal for regulated industries.
Getting Started & Configuring
Follow the steps outlined below to use Commvault Cloud with Wasabi.
Prerequisites
-
A Commvault Cloud account subscription
-
Commvault Cloud Backup Gateway downloaded and installed
-
An active Wasabi cloud storage account
Configuring Wasabi as a Cloud Storage Target
-
Login to the Commvault Cloud account.
-
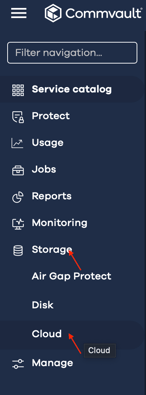
Navigate to Storage and click on Cloud.
-
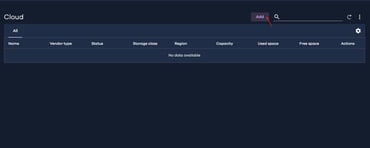
Click Add to add a new storage target.
-
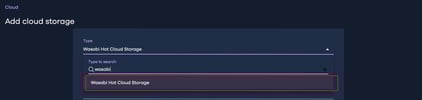
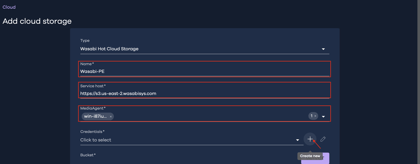
In the Add Cloud Storage window, expand the Type dropdown menu. Search for Wasabi and select Wasabi Hot Cloud Storage.
-
Next, provide the following details:
-
Name - provide a name for the cloud storage
-
Service Host - provide the endpoint URL of the region where the bucket is located
-
Media agent - Select the desired media agent
Click the “+” sign under Credentials to add the credentials for your Wasabi account.
Note: This configuration example discusses the use of Wasabi's us-east-2 storage region. To use other Wasabi storage regions, use the appropriate Wasabi service URL as described inService URLs for Wasabi's Storage Regions.
-
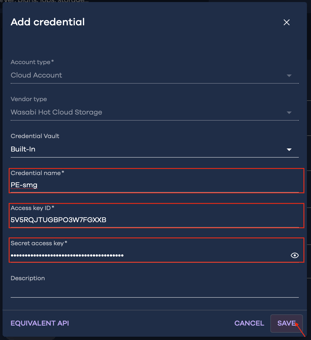
In the “Add Credential” dialog box, provide the following details and click “Save”.
-
Credential name - Provide a name for the credentials
-
Access key ID - Provide the Wasabi access key
-
Secret access key - Provide the Wasabi secret access key
-
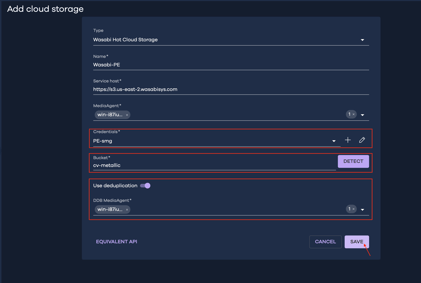
Select the added Wasabi credential and provide a bucket name. Enable deduplication and add a location for the Deduplication DB location. Click “Save”.
-
The Cloud tab displays the newly added Wasabi storage location.

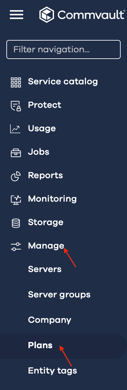
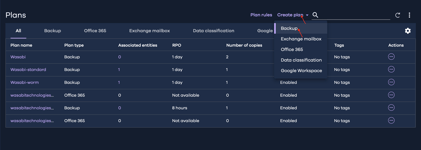
Creating a Backup Plan
-
Navigate to Manage and click on Plans.
-
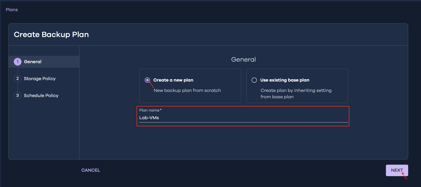
Click “Create Plan” and select “Backup”.
-
In the “Create Backup Plan” wizard, select “Create a new plan” option and provide a name in the “Plan name” field. Click “Next”.
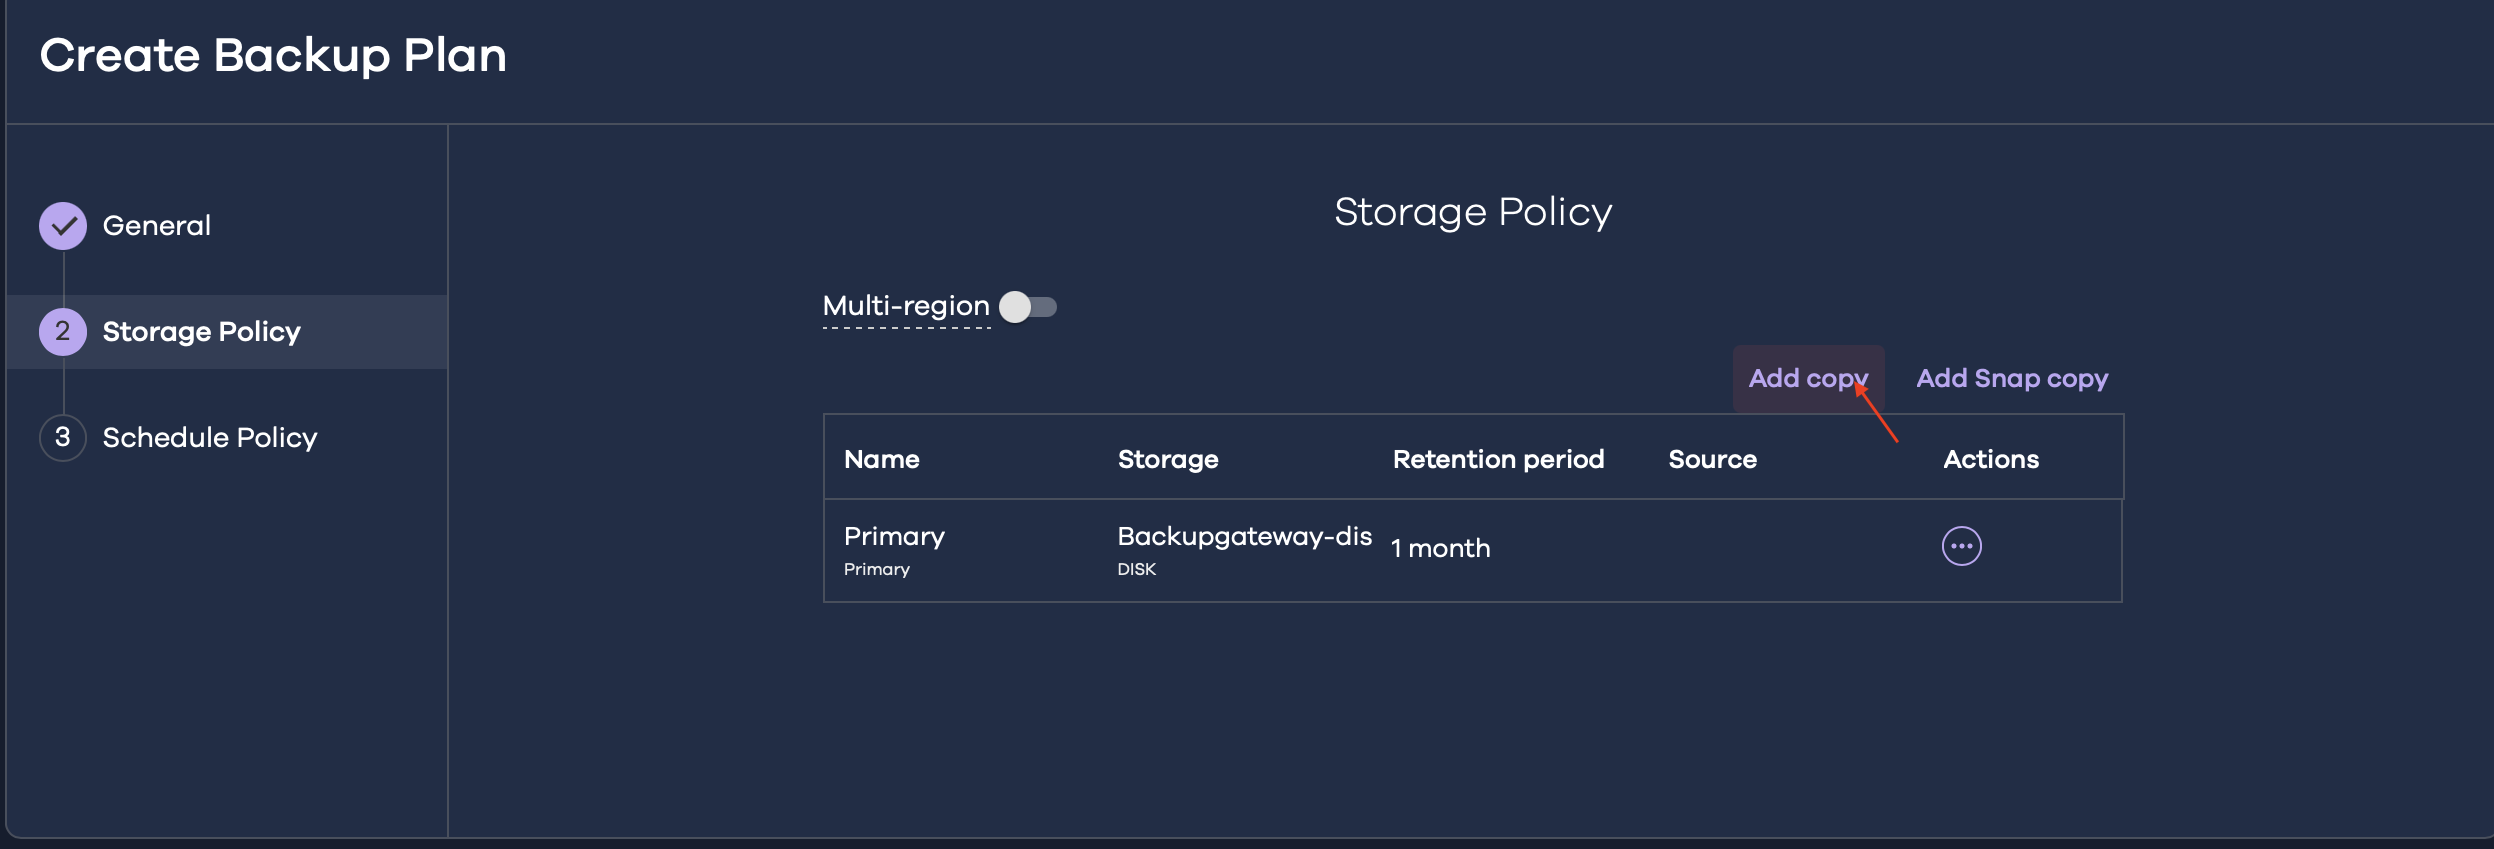
- In the “Storage Policy” tab, we will configure the storage targets. Click on “Add Copy”.
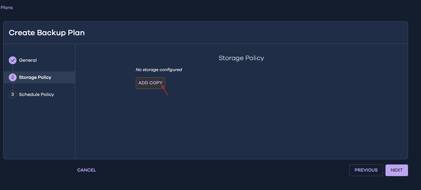
-
Wasabi can be configured as a Primary storage or as a target for a secondary copy of the backup data.
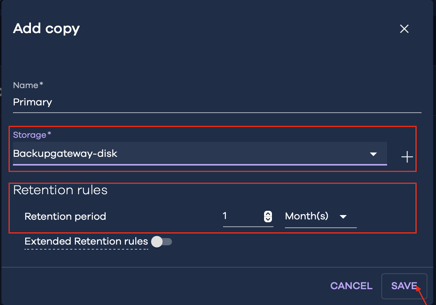
5.1. Configuring Wasabi as a Primary Copy
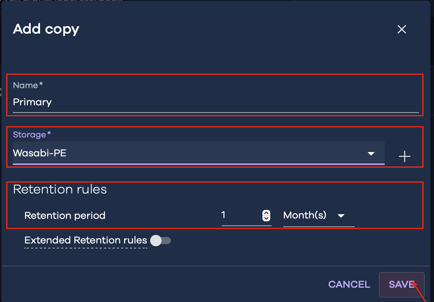
5.1.1. In the Add copy dialog box, provide the following details and click “Save”.
-
Name - provide a name for the destination
-
Storage - select the Wasabi storage location configured earlier
-
Retention period - configure the desired retention period
Click “Next” to configure the Schedule Policy.
5.2. Configuring Wasabi as a Secondary Copy
5.2.1. To configure Wasabi as a secondary storage target, configure the desired storage as primary storage and click “Save”.
5.2.2. Next click ‘Add Copy” to add Wasabi as a secondary copy.
5.2.3. Provide the required information and click “Save”.
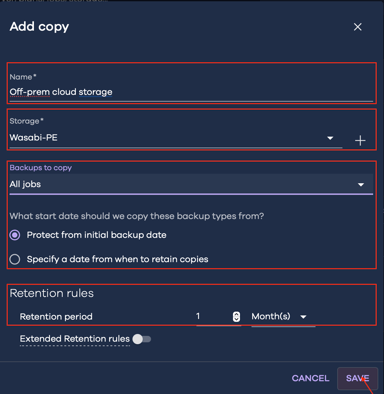
Click “Next” to configure the Schedule Policy.
-
Configure the desired schedule policy and click “Submit”.
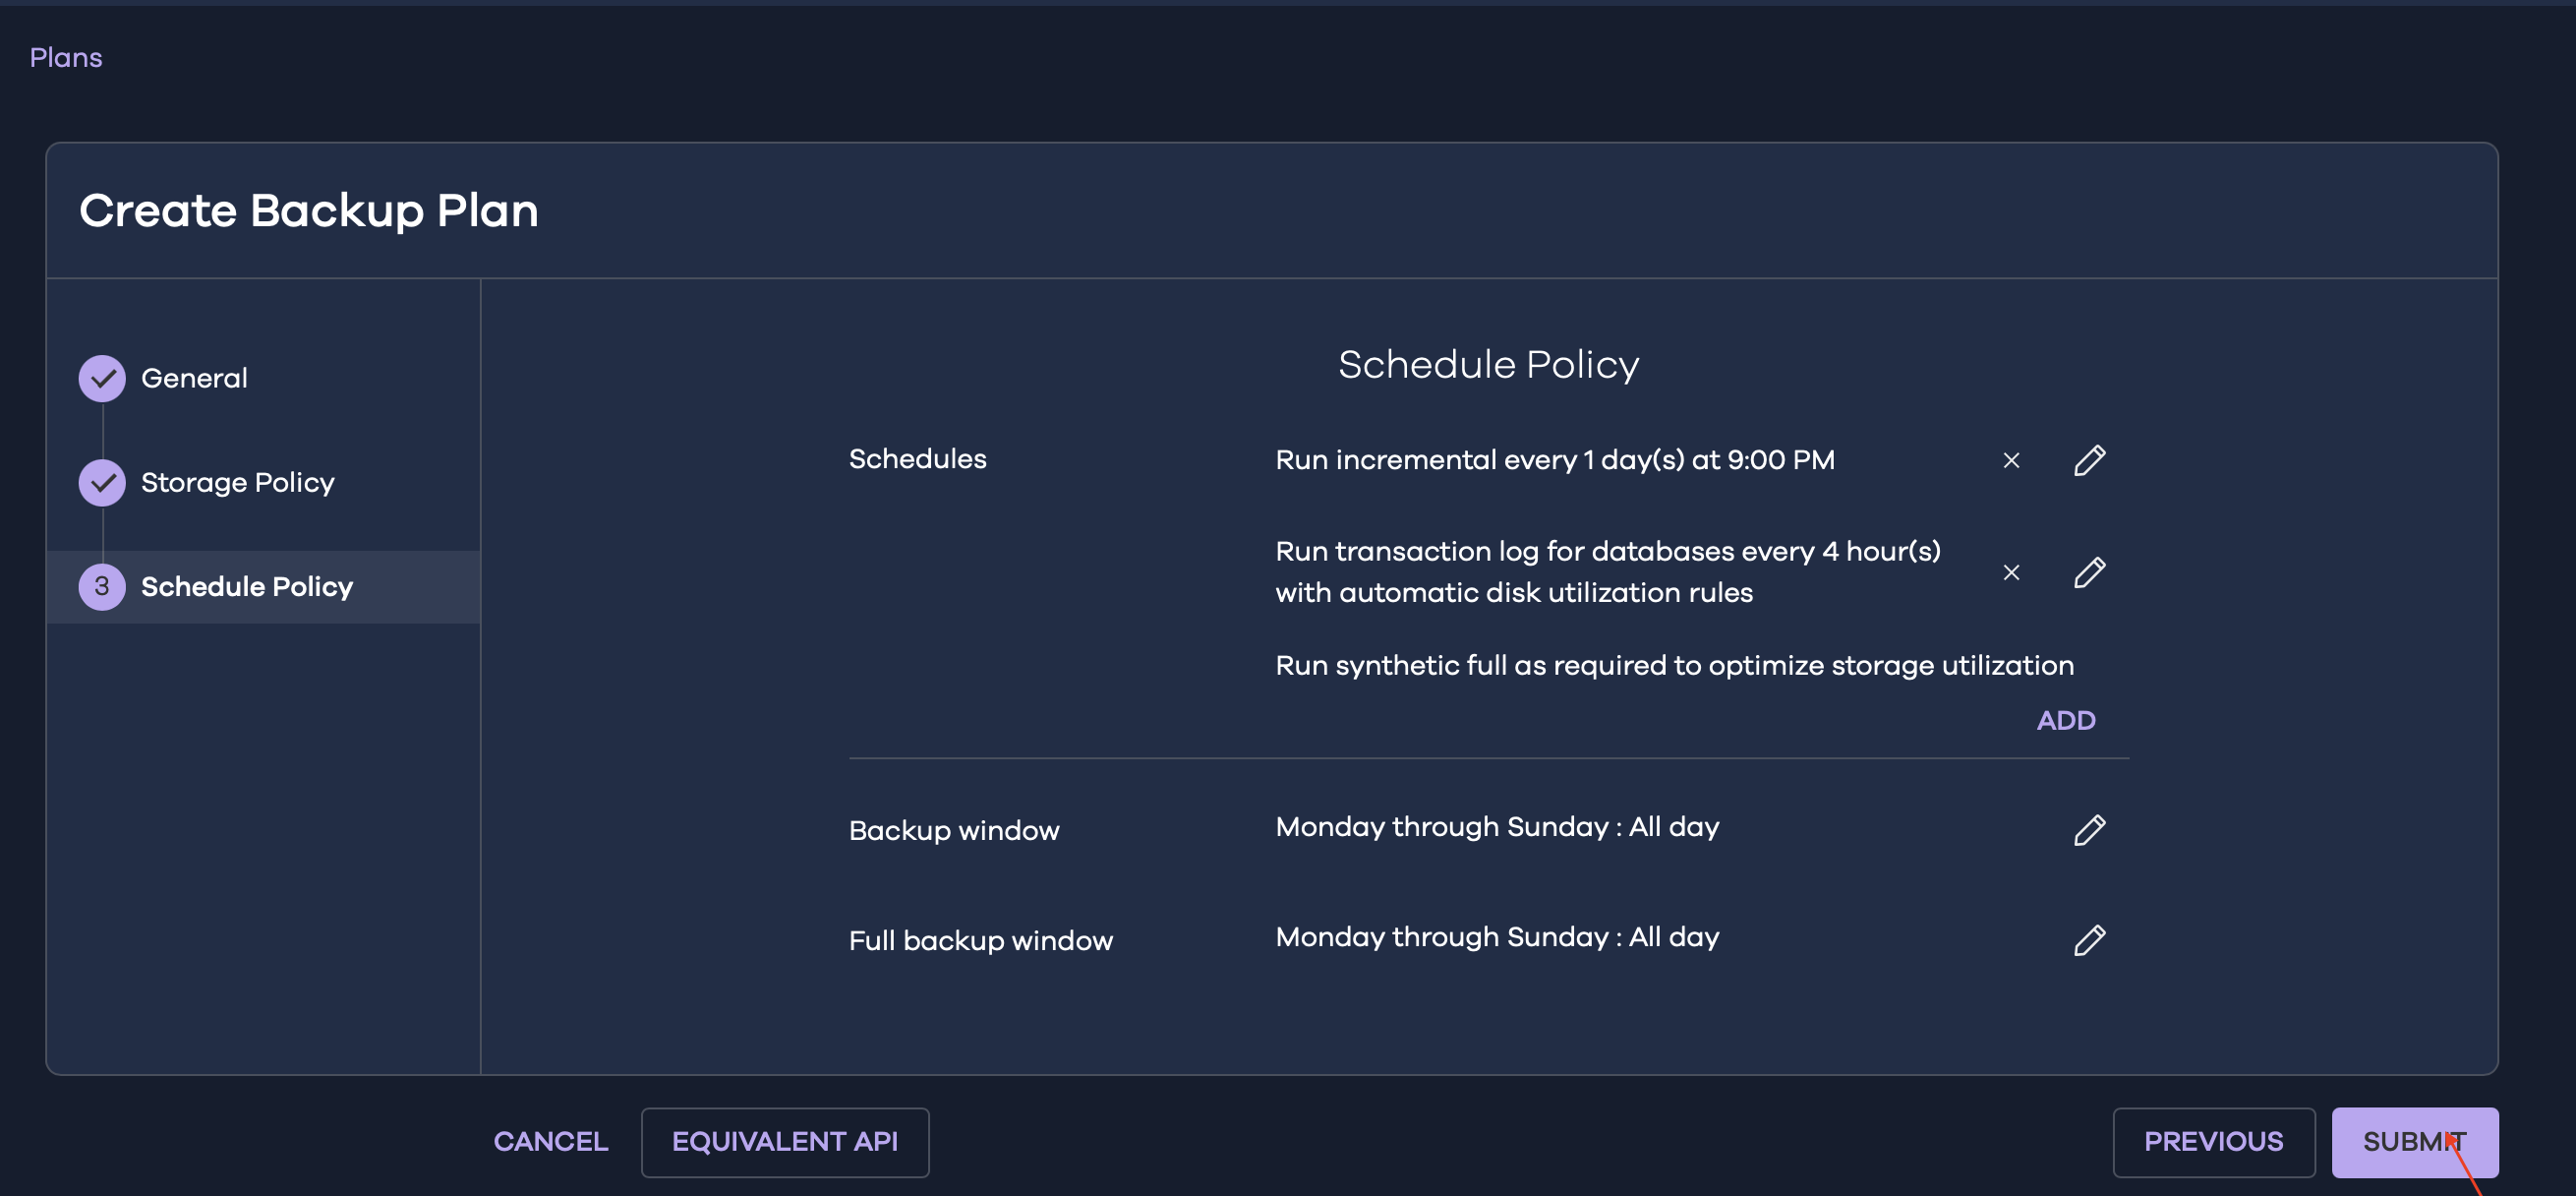
The virtual machines associated with this plan will be backed up to the Wasabi storage location.
This validation marks a continued chapter in flexible, cost-effective cloud data management. Whatever data types you are protecting, Wasabi and Commvault together offer a powerful solution for modern data protection environments.
To request fast and simple pricing on Wasabi for your Commvault environment, contact your COOLSPIRiT account manager today, or contact us via: hello@coolspirit.co.uk or 01246 454222.


